Classes

Dorothy's Creative Classes and Workshops
Click here for more information about my classes and workshops!

Thursday, 27 September 2012

Creative Workshops and Classes

Join in for fun times while learning new techniques and tips.
If you don’t see a class that you’d like, please let me know and I’ll try to arrange something for you!! Also, if there is something specific you’d like me to teach, let me know. 
All classes are held at my home in Strathroy, if you would like a class for friends at your home, let me know!

Wednesday November 14,  7:30pm-9:30pm – Christmas Cards (special price)  $15
          - 10 cards, 2 each of 5 designs, with envelopes.

Tuesday November 20, 7:30pm-9:30pm  – Brag Book Mini Album    $25
          - at each mini album class we will make a different type of mini album, you will learn a lot of great techniques.  This class will be a brag book that is perfect to give grandma or mom for Christmas!

December – Kids (10 and up) beginner scrapbooking class and/or cardmaking class
          - still working out the details for this, but please let me know if you are interested and I will let you know as soon as I know the details.

Tuesday January 15, 7:30pm-9:30pm – Interactive Card Class   $15
          - 8 cards, 2 each of 4 designs with envelopes (assorted events). 

Wednesday January 16, 7:30pm-9:30pm – Technique Scrapbooking Class  $15
          - 2 complete and embellished two-page layouts using a few new techniques.

Sunday February 3,  1pm–4:30pm – Kids (10 and up) Valentines Day Cards  $20
          - 20 classmate cards (a couple different designs) and one special teacher card
          - snack of cookies and milk/juice will be provided

Wednesday February 6, 7:30pm-9:30pm – Card Class    $15
         - one very special Valintine card
         - 6 other cards, 2 each of 3 designs with envelopes (assorted events)

Wednesday February 20, 7:30pm-9:30pm – Technique Scrapbooking Class  $15
         - 2 complete and embellished two-page layouts using a few new techniques.

Wednesday March 20, 7:30pm-9:30pm – Vacation Mini Album    $25
        - at each mini album class we will make a different type of mini album, you will learn a lot of great techniques.  This class will be a vacation mini ablum, perfect for a quick and beautiful way to capture vacation memories!

Contact Dorothy Seiler at dorothyseiler@hotmail.ca or 519-245-8119 for more information and to register.

Tuesday, 25 September 2012

Congrats Cards - lots of layers!

I don't know why but I always find congrats cards for a wedding to be the most difficult to find inspiration for.  I needed to make two cards for girls at work, I wanted to do something with their wedding colours but I was having a hard time feeling inspired to create.  Then I saw the Deconstructed Sketches sketch (DS70) for this week, and things came together very quickly after that!

Here are the two cards that I created using multiple CTMH stamps some CTMH paper and some paper and ribbon from my stash.


Monday, 24 September 2012

H2H Challenges - Anything Christmas


This weeks challenge at H2H is to create anything Christmas.  

I needed to work on my samples for the card class I'm holding in November so I decided to do a card for this challenge and kill two birds with one stone :-) I used one of our new stamp sets and cardstock.


I used a pattern from the new Make It From Your Heart publication from CTMH.  As you know, I love sketches!!  I love the sayings on this stamp set, here is what I put inside this card.


Head on over to the Heart 2 Heart Challenges blog to check out the other awesome Christmas inspiration.

I’d love to see your Christmas creations too!  Here's how to join in this week's challenge:

  1. Use mostly Close To My Heart products, though it doesn't have to be 100%.
  2. Create your Christmas creation
  3. Post your project to your blog or other online gallery.
  4. Come back here and directly link to your blog post, not your blog home page. 
  5. Mention Heart 2 Heart somewhere in your blog post indicating that you are playing along with us and link to our site. 
  6. Consider adding the H2H badge to your blog. We'd love to spread the word and see more crafters participating! 
  7. Finally, you have the whole month of September to join us on any of our September challenges and be eligible for our Top Ten!

Monday, 10 September 2012

H2H Challenges - Stressed out Biggie card

This weeks challenge at H2H is to create a "biggie" card, a card larger than your standard cards.

My card is 5x7 and it's Stressed Out - no, that's me this weekend, the card is distressed with my CTMH edge distresser.


I used a pattern from the new Make It From Your Heart publication from CTMH.  As you know, I love sketches!!  I didn't alter the pattern much as I wasn't feeling as creative as normal, but still the card came out nice if I do say so myself.  I used the Stella paper pack and the Love Life stamp set.

Head on over to the Heart 2 Heart Challenges blog to check out the other awesome inspiration, I'm truly humbled by they cards that the rest of the design team created this week!!!

I’d love to see your BIGGIE cards too!  Here's how to join in this week's challenge:

  1. Use mostly Close To My Heart products, though it doesn't have to be 100%.
  2. Create your BIGGIE card!
  3. Post your project to your blog or other online gallery.
  4. Come back here and directly link to your blog post, not your blog home page. 
  5. Mention Heart 2 Heart somewhere in your blog post indicating that you are playing along with us and link to our site. 
  6. Consider adding the H2H badge to your blog. We'd love to spread the word and see more crafters participating! 
  7. Finally, you have the whole month of September to join us on any of our September challenges and be eligible for our Top Ten!

Sunday, 9 September 2012

Anniversary Card - Florentine Paper

I needed a special anniversary card for my brother and sister-in-law and since it didn't need to go in the mail as it was being hand delivered, I could make it bulky!  I really like the 3D flowers from the CTMH Art Philosphy Cricut Cartridge, but I don't get to use them often because I'm not a big and bulky scrapbooker.

I used the Mojo Monday challenge sketch as a starting point, and between having that sketch and having all the papers and inks matched for me by using the CTMH Florentine paper this card came together very quickly!


Tuesday, 4 September 2012

How to make a hard bound book cover (as promised)

Well, as promised, I've got the instructions here for how to make a hard bound book cover.  I'm re-making the one I did for the little 3x3 mini I posted pictures of a week ago, but with different papers.  I took pictures all the way through the process and now I'll do my best to explain each step.  Let me know if you need any clarification or help.  Also, I'd love to do a class in town "all about minis" let me know if you'd like that!


First the supply list (and of course I forgot a couple in the picture.
- Outside cover cardstock - 8.5" x 4"
- Inside cover cardstock - 7.5" x 3"
- cardboard (whatever thickness you'd like) - 2 pieces 3.25" square and one 3.25" x .75"
- acid free glue
- small foam brush
- clear ruler (like the awesome CTMH one)
- bone folder
- scissors

Step 1 - Without glue, get everything laid out.  Take the 8.5x4 outside cover paper and lay it good side down, then using the ruler for spacing, lay out the cardboard pieces.  The outside edges are all 3 small squares on the ruler (or 3/8's of an inch) and the spacing between the 2 larger pieces of cardboard and the spine is 2 squares on the ruler (or 1/4 of an inch).  Leave the ruler sitting on the project like this and use it as a guide when you start gluing, it really helps a lot!


Step 2 - spread glue all over the first piece of cardboard.  Depending on the type of glue you have you may need to move pretty fast, I used a fast drying so I had to move really fast, a slower drying glue is ideal, but I didn't have any. It's best to hold the cardboard off the surface, so you don't make a huge mess and you can brush right to the edges.  Try to make it smooth, to avoid bumps on your cover. Also, don't totally saturate your paper in glue, that will make the whole project curl as it dries. In the next picture you can get a good idea of what is enough glue.

Place the glued piece of cardboard on the cover stock using the ruler as a guide and rub/press it down all over using LOTS of pressure to be sure it's totally stuck down on all the edges and everything.  Again, quickly before the glue dries. I use my bone folder for the this and even flip it over to press on the "good" side of the cover to ensure it's all stuck down well.

Continue for all three pieces of cardboard, doing the spine second.


Step 3 - Once you have all three pieces glued to the outside cover, we need to get it ready for wrapping.  To make the corners cleaner and easier to fold, chop off all four corners, leaving about 1/4 of an inch of paper at the corner (see the picture).

Step 4 - Using the bone folder, run it along all the edges to create a fold line.

Step 5 - Now fold up the edges, again using the bone folder is the easiest way to do this. Fold them all up first without glue.

Step 6 - Starting with the shorter sides, use your foam brush and some more glue to cover the flap with glue and then use the bone folder and lots of pressure to fold over and stick down the two short sides.  Do NOT do the long sides until after you've done the next couple of steps.

Step 7 - The next three pictures all describe this step, it's hard to explain so I hope the pictures help. They are the before, during and after pictures.  This is where you are going to "wrap" the corners so that you end up with a nice clean corner in the end.  Using the bone folder press in the corner kind of like what you do to wrap a present. It takes some practice to get this right, but don't worry, it's not that hard once you try!


Step 8 - Once you have all 4 corners wrapped, then you can glue down the flaps on the long sides. Use your fingers to make sure that you press down on the paper in the cracks of the spine, to be sure that the flap sticks there also.

Step 9 - Glue the inside cover on (which covers up all the glue and other messes you've made while folding and gluing. I use the foam brush again for this, to spread an even coat of glue all over the paper, right to the edges.  Then use the bone folder and lots of pressure rubbing all over to get the paper stuck down well.

Step 10 - (I know, I switched papers...) When gluing on the inside cover, be sure to use your fingers to really press down hard on the valley's in the spine to get the outside and inside covers sticking to eachother.  You will end up with it looking like this picture if you do this well.  Once everything is glued down, before the glue is 100% dry and brittle work the spine a bit by opening and closing the book.

Now it's time to add your inside paper, however you've created your inside papers, now is the time to add them, there are so many options and ways for this....I'd love to show you some of the more complex stitch bindings that we can do, but not today!

The mini that I created this cover for (which was posted a week ago) the inside pages were a maze book and I simply glued the back page to the back inside cover and voila, there's the book. Click here to see that project.

I hope you've found these instructions helpful!!! Happy crafting!


Saturday, 1 September 2012

And another Challenge Card

Never a "fun" card to have to make, a get well or thinking of you card.....I liked the idea of just keeping this one simple and the sketch from I Spy (ISSC31) was perfect for that.  I'm also entering this in the ScrapFit Workout #75 challenge which was to use twine.  

If you are looking for inspiration, these challenge blogs are great.

This card was made with the Roxie paper pack from CTMH which is now retired.  It wasn't one of my favourites when it was in the catalog, but now I'm really liking this one print.


More Challenge Cards...

I have a bunch more thank you cards to get created and sent out to thank all the wonderful businesses in town that have done so much to help our 1st Strathroy Scout group as well as our Strathroy Area Scouts in their efforts to raise money to get to the Canadian Jamboree next summer.  I have a hard time just reproducing the same card over and over, so the challenge blogs that are are  there are a great inspiration.

This card was inspired by Mojo Monday's sketch and the colours from the Play Date Cafe.


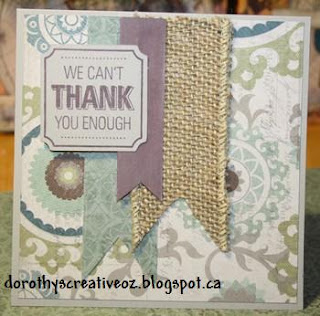
I love the new burlap ribbon from CTMH, isn't it just so great looking!!!!